Randy A. Bergum
September, 2008
The purpose of this article is to review a successful Refurbish and Repair of the Wurlitzer Toe Boards. Topics covered include refurbishing Pallet Valves, Toe Boards, and repairing cupped Toe Boards.
Wurlitzer toe boards were made with three layers of wood stacked vertically. This composite construction provides stability as the grain movement in each layer can partially negate the others.
In order from Bottom to Top, the layers and descriptions are as follows:
Over the years Wurlitzer made improvements in the toe board design as follows:
Pallet valves should have originally been adjusted to contact the center of the Secondary Pneumatic Flange. The spoons dodge right and left to avoid screws and hardware inside the chest, as well as poorly placed pneumatics.
Note: Before removing the pallet valves, number them so to replace back in the original positions. This will help you minimize readjusting all the spoons back to the optimum spots.
The pallets have two layers of valve leather that can be pulled off easily by hand.
Note: Sometimes you will encounter Mystery Glue (White PVA glue, or anything else) that will not come off with hot water. Sand off old leather and mystery glue on belt sander - remove the MINIMUM amount of wood, but ensure that the final surface is flat.
Leather is two layers of valve leather available from reputable Organ Supply Houses and can be had in prefab strips. For Manual Chests there are two widths: 2-5/16 and 3-5/16
Note: If the seating surface is cupped, see the section later in this article.
To Assemble
Note: The guide pins should be straight and must not bind.
The bottom layer of a toe board can cup, especially if exposed to moist conditions.
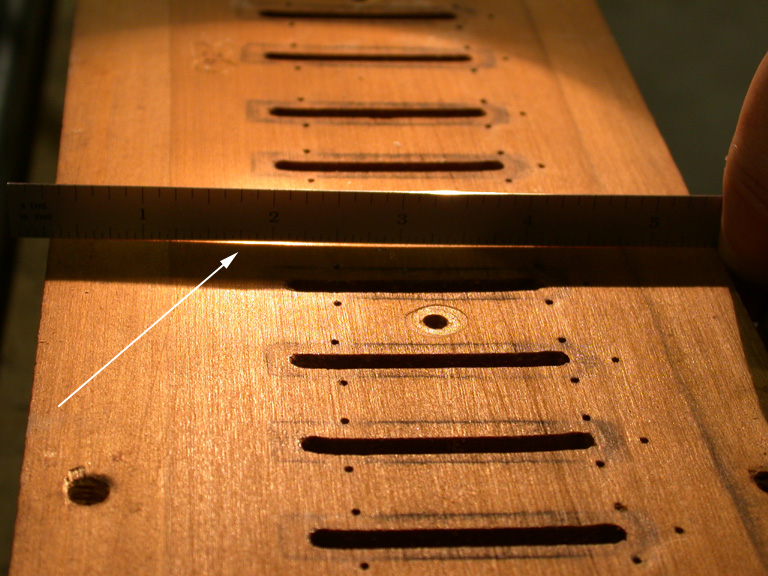
To check, place a straightedge across the pallet seating surface and shine flashlight at back of edge. If there is cupping, light will show through. (see arrow below)
Photo #1: Cupped Valve Surface and Gap
To Repair:
Note: Check your work with straight edge and make sure you don't see light on bottom edge of ruler.
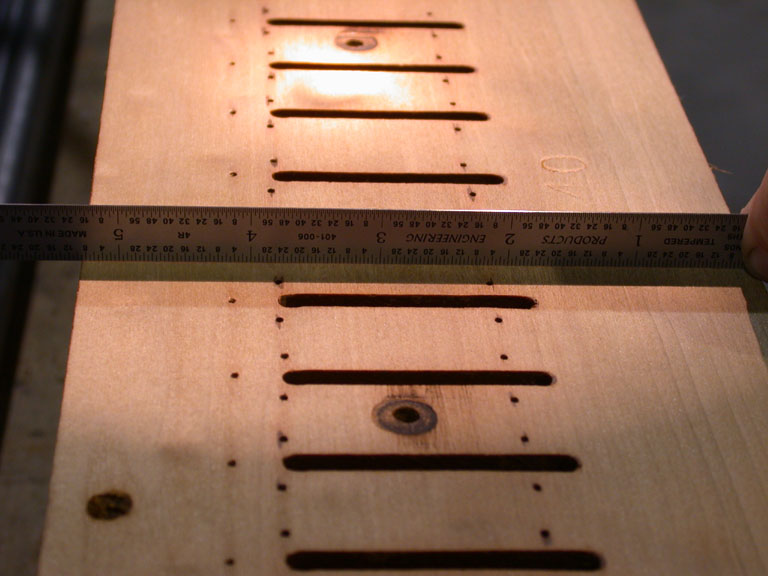
Photo #2: Valve Surface After Skimming
At this point you will want to releather the pallet valves, as they will have taken a set to the old cupped seats and will murmur after reassembly.
If the guide pins were damp, they may have rusted at the surface of the wood. To fix this do the following:
Now reassemble the spring guide hardware, and install the pallets and springs.
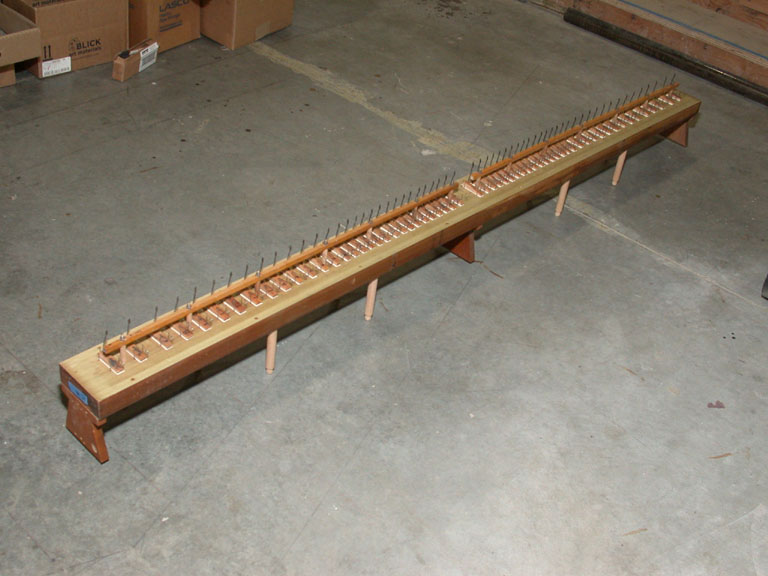
Photo #3: Finished Toe Board
If the chest was exposed to water, some of the glue may have been damaged that binds the toe board layers together. In some cases an air channel will open up causing cross-talk between notes and murmuring. Some folks have solved this by stripping the toe board and pouring burnt shellac into each toe hole (as per factory), then rotating the entire board around such that the glue coats the entire interior surface, effectively sealing the leaks. (anecdotal info.)
Many thanks to John Ledwon for help in preparing this article.
Return to Wurlitzer Tools and Repairs Menu
Copyright © 2008 and Beyond Randy A. Bergum All Rights Reserved